
Bookings
Bookings lets your customers book appointments with you, and lets your team manage those appointments in one place: services, staff, the calendar, payments, and automatic WhatsApp messages when a booking is confirmed, completed or cancelled.
Before you start
- Bookings is available on the Premium plan. If you don't see Bookings in your sidebar under Automation, check your plan or contact support.
- You need permission to see bookings. To change the booking settings (hours, rules, turning booking on or off), you need permission to open Business Config. See Roles & permissions.
- To send booking messages, you need approved WhatsApp templates.
Set up bookings
Do these once, in this order.
1. Set your booking hours and rules
- In the sidebar, under Settings & Support, click Business Config.
- Open Booking Configuration.
- Under Booking Status, make sure the system is System Online. When it is offline, customers can't book through WhatsApp.
- Under Booking Hours, set the Opening Time, Closing Time and Working Days. Times are in your business timezone, which you set under General.
- Under Appointment Rules, set:
- Slot Duration (min) — the length of each bookable time slot.
- Lead Time (hours) — how far ahead a customer must book.
- Max Bookings per Slot — how many bookings one time slot can take.
- Optional: write your Cancellation Policy under Policy & Terms. This is a note for your team: Midlr doesn't show it to customers. To tell customers your policy, put it in your booking messages (step 4).
- Click Save Changes.
See Business Config for the other settings on that page.
2. Add your services
- In the sidebar, under Automation, click Bookings.
- Click Manage > Services.
- Click Create Service and fill in the Service Name, an optional Description, the Duration in minutes and the Price.
- Keep Active Service on so customers can book it. Turn it off to hide a service without deleting it.
- Click Create Service.
3. Add your staff
- Click Manage > Staff.
- Click Create Staff and fill in the Full Name. You can also add a Role / Position, Hourly Rate, Email Address, Phone Number and notes.
- Keep the member Active so they are Available for bookings.
- Click Create Staff.
Click a staff member to see their Performance Statistics: total, completed and upcoming bookings, and revenue.
4. Set up booking messages
Midlr can send the customer a WhatsApp message automatically when a booking changes status.
Click Manage > Notifications.
For each status you want, click Set up message:
Status When the message is sent Pending When the booking is created and awaiting confirmation Confirmed When the booking is confirmed by staff Cancelled When the booking is cancelled Completed When the service has been completed Choose the WhatsApp Template and the Business WhatsApp Number to send from.
Under Template Variables, pick which booking detail fills each placeholder in the template, for example Customer Name, Service Name, Booking Date, Booking Time, Staff Name or Booking Reference. Left empty, the template's example value is used.
Check the Message Preview.
Click Save All Rules.
Messages are sent Immediately when the status changes. You can switch each rule on or off, or delete it.
TIP
Because these are templates, they reach the customer even when the 24-hour window is closed.
How customers book on WhatsApp
Customers book through a booking form that opens inside WhatsApp. The form shows your live services, staff, dates and free time slots, based on your booking hours and rules. When the customer submits it, the booking appears in your Bookings list.
You can send the booking form in several ways:
- From a bot: add a Flow node with your booking form in the Bot Factory, for example after a "Book an appointment" button.
- From an AI Employee: turn on Send the booking flow for the employee and pick the form in the bot's AI Employee node. See AI Employees.
- From a chat: send the form from the inbox.
- In a template: add the form as a Flow Button to a Marketing template.
Get your booking form
The booking form is a special form that Midlr support adds to your account. Contact support to get it. Once it's added, it's on the Forms page with the status Cloned. Open it, click Configure & Save, then publish it. It's an Advanced form, so you need the Meta key first. See Forms.
WARNING
A booking form you build yourself, or start from the Form Library, is a normal form. It doesn't show your live services and free time slots, and it doesn't create bookings.
If booking is turned off in Business Config, the form tells the customer that booking isn't available.
Create a booking yourself
Use this for phone calls and walk-ins.
- On the Bookings page, click Create Booking. Book an Appointment opens.
- Customer — choose Existing Customer and search your contacts, or Walk-in Customer for a new customer or guest.
- Services — pick one or more services. The total price and duration are shown.
- Staff — pick a staff member, or Any Available.
- Datetime — pick a day (Today, Tomorrow or Other date), then one of the Available Times. If no times are free, try another day or another staff member.
- Details — add notes. For a walk-in, enter at least the First Name and Phone Number.
- Check the Booking Summary and click Confirm booking.
You can also create a new service or staff member from inside these steps.
Manage bookings
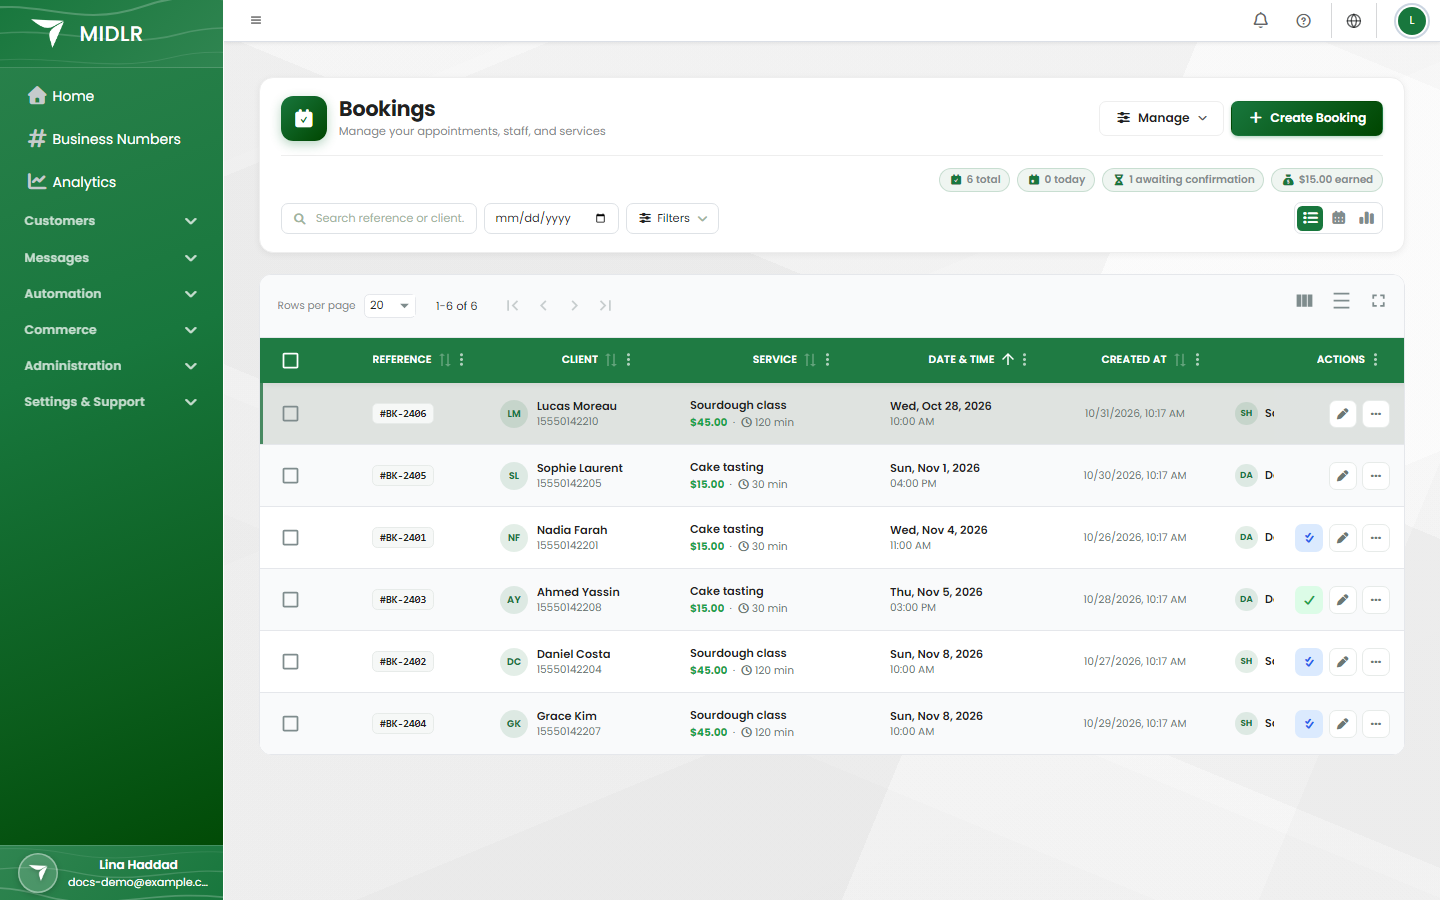
The Bookings page shows all bookings with Reference, Client, Service, Date & Time, Staff, Status and Payment. At the top you see how many bookings are today, how many are awaiting confirmation, and how much you earned.
- Switch between List, Calendar and Analytics views.
- Search by reference or client, and filter by status, staff, service and date.
- A warning marks bookings whose time has passed but are still open.
Booking statuses
| Status | Meaning |
|---|---|
| Pending | New, waiting for you to confirm. |
| Confirmed | You confirmed it. |
| Completed | The service is done. |
| Cancelled | The booking was cancelled. |
| No Show | The customer didn't come. |
Change a booking
Each row shows the next step as a button:
- Confirm booking for a pending booking.
- Mark as completed once the appointment has started or passed.
Open the row menu for more:
| Action | What it does |
|---|---|
| Edit booking | Change the status (including No Show), client name, staff, services and Internal Notes. |
| Reschedule | Pick a new date and an available time, then Confirm Reschedule. |
| Cancel booking | Marks the booking as cancelled. Possible for pending bookings and for confirmed bookings that haven't started yet. |
| Add Payment | Records a payment for this booking (see below). |
| View attachments | Upload or download files for the booking, such as photos or proof of payment (up to 10 MB each). |
| Delete booking | Deletes the booking permanently. |
If you set up booking messages, changing the status sends the matching message to the customer.
WARNING
Deleting a booking can't be undone. To keep a record, cancel it instead.
Calendar
The Calendar view shows bookings by month, week, day or list, colour-coded by status. Click a booking to edit it.
Analytics
The Analytics view shows Total Bookings, Completed Revenue, Pending Revenue and Lost Revenue, with a breakdown by status.
Record payments
Midlr keeps a record of what customers paid for their bookings. It records payments you take yourself (cash or card); it doesn't charge the customer.
For one booking: open the row menu and click Add Payment. Enter the Amount, Method and any Notes. The booking shows what is Paid and Remaining, and any tips.
For all bookings: click Manage > Payments to open the Payments Dashboard.
- See Total Payments, Total Amount, Pending Amount, Failed Payments and Refunded Amount.
- Filter by status, method (Cash or Card), type and date.
- Click Create Payment to record a payment, a Refund or a Partial Refund for a booking, then click Confirm Payment.
- Open a payment and click Process Refund to record a full or partial refund, with a reason.
The Payment column on the bookings list shows Unpaid, Partial, Paid or Refunded.