
Bot Factory
A bot answers your customers on WhatsApp automatically. It replies to their messages, shows them buttons and menus, collects details, and passes the chat to a person when needed. You build each bot by dragging blocks onto a canvas and joining them with lines, so you can see the whole conversation as a map.
Before you start
- You need a connected business number.
- Bots are available on selected plans. If you don't see Bot Factory in your sidebar, check your plan or contact support.
- You need permission to see bots, and separate permission to create or edit them. See Roles & permissions.
How a bot works
Every bot is a chain of steps (we call them nodes):
- A trigger decides when the bot starts. For example: "when a customer sends hello", or "when a customer sends an order from my catalog".
- Message nodes send something to the customer: text, buttons, a list, a picture, a form, and so on.
- Action nodes do something behind the scenes: tag the customer, create a lead, pass the chat to an agent, hand the conversation to an AI Employee, call your own system, and more.
When a customer taps a button or picks a row in a list, the bot follows the line that leaves that button or row. This is how you build menus with several paths.
TIP
Bots can only send free messages while the customer's 24-hour window is open. Because a bot starts when the customer writes to you, the window is normally already open.
Bot sessions
The top of the Bots page shows how many Bot Sessions your business has left. One session is used each time a bot starts a conversation with a customer. When you reach zero, your bots stop replying until your sessions renew with your plan. To get more sessions sooner, contact support. See Plans.
The Bots page
In the sidebar, under Automation, click Bot Factory. You see:
- Bot Sessions, Total Bots and Active Bots at the top.
- A table of your bots with Bot Name, Business Number, Triggers, Frequency, Status and Created.
- Filters for status, trigger type and frequency, and a search box that finds bots by name or trigger keyword.
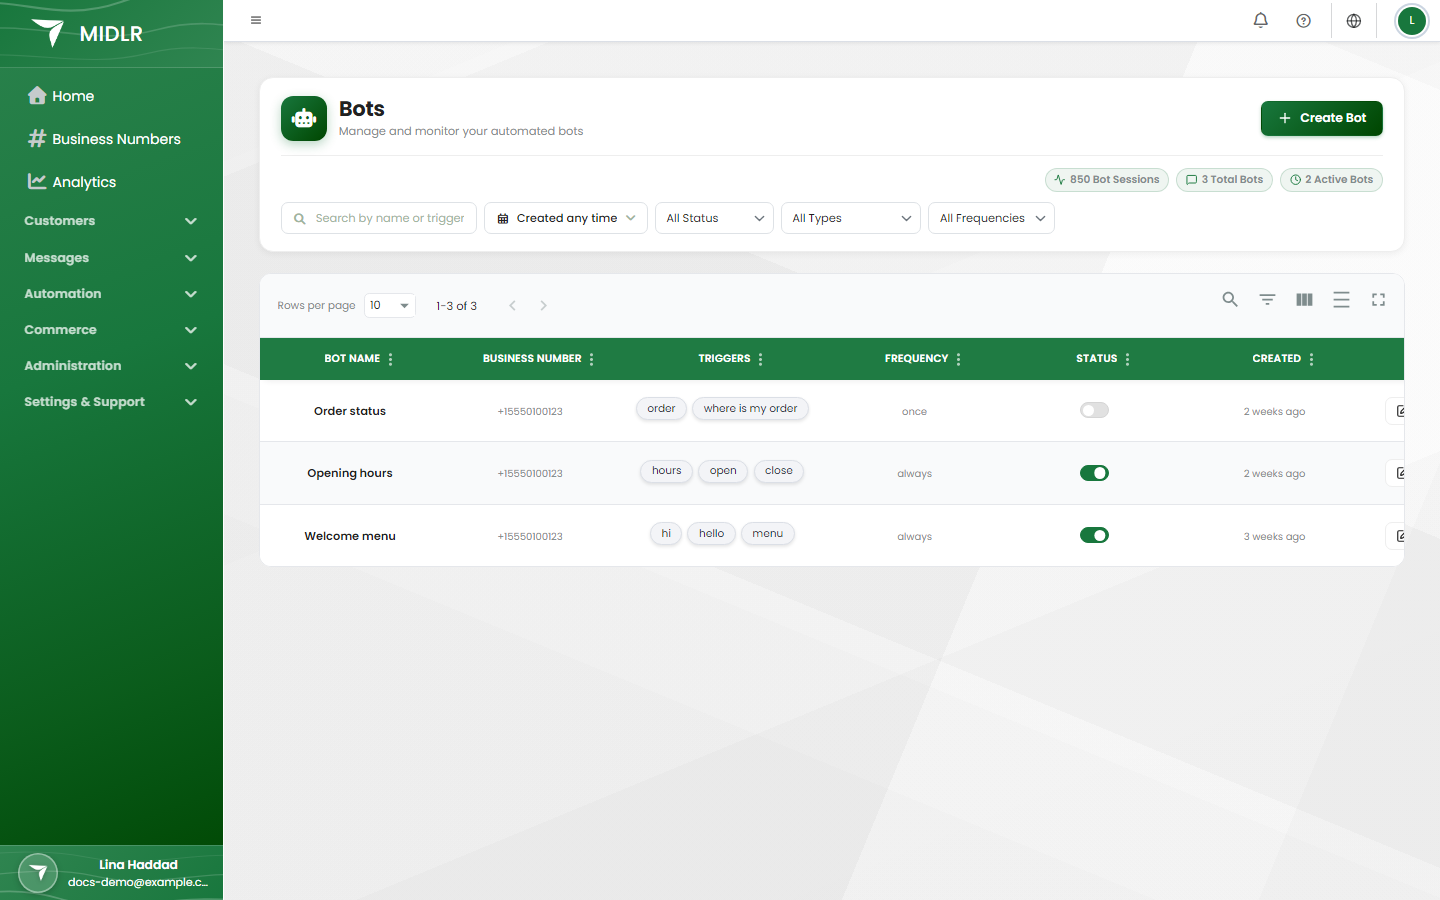
Each row has Edit and View Analytics, plus a More menu with Quick Edit, Duplicate Bot and Delete Bot.
Create a bot
- On the Bots page, click Create Bot.
- Choose how to start:
- New Bot to build on an empty canvas, or
- pick a ready-made bot from the library, then click Use This Template. You can change everything after it loads.
- Drag a Text Trigger or Order Trigger onto the canvas. Every bot must start with a trigger, and a bot can have only one.
- Drag message and action nodes onto the canvas and fill them in.
- Join the nodes: drag from the small dot on the right of one node to the left side of the next one.
- Click Save. In the window that opens, fill in:
- Bot Name
- Business Number — pick one number, or leave it on All Business Numbers to use the bot on every number.
- Trigger Frequency (see below)
- Ad Triggers (optional, see below)
- Click Save Bot.
TIP
You can also add a node by dragging a line out of a node and dropping it on empty canvas. A Select Node Type window opens and shows only the nodes that fit there.
If you reload the page by mistake, Midlr restores your unsaved edits and shows Unsaved changes restored. Click Save to keep them.
Canvas tools
| Tool | What it does |
|---|---|
| Clone Selected | Copies the selected nodes (shortcut: Ctrl+D, or Cmd+D on Mac). |
| Delete Selected | Deletes the selected nodes. The trigger can't be deleted this way. |
| Tidy Up | Rearranges the nodes into a clean layout. |
| Library | Loads a ready-made bot (only while creating a new bot). It replaces what is on the canvas. |
| Save as Template | Saves this bot to your library so you can reuse it. |
| Variables | Drag Client Name or Client Number into a message field. The bot fills in the customer's real name or number when it sends. |
Triggers: when does the bot start?
Text Trigger
Starts the bot when a customer sends a message. Under Triggering messages, choose:
- Any Message — the bot starts on any message the customer sends.
- Custom Messages — the bot starts only when the message matches one of your trigger messages. You can add up to 10, each up to 200 characters.
For custom messages, open Advanced Options:
- Case Insensitive — "Hello" and "hello" count as the same.
- Partial Match — the bot starts if the message contains the keyword, not only when it is exactly the keyword.
If a customer's message matches a bot with keywords and also an Any Message bot, the bot with keywords wins. The Any Message bot only runs when nothing more specific matched.
Order Trigger
Starts the bot when a customer sends you an order from your WhatsApp catalog (the cart). Use it to thank the customer, ask for delivery details, or send a form. See Orders.
Ad Triggers
When you save a bot, you can paste the IDs of your Meta (Facebook or Instagram) ads under Ad Triggers. The bot then starts when a customer messages you after clicking one of those ads, even if their message doesn't match a keyword. You find an ad's ID in Meta Ads Manager.
Voice notes
A plain bot does not start from a voice note. A voice note can start a bot only when that bot contains an AI Employee that is set to accept voice notes. The AI Employee then listens to the voice note and answers it.
Trigger Frequency
This controls how often the same customer can start the bot.
| Option | What happens |
|---|---|
| Once | The bot runs only the very first time for each customer, then never again. |
| Always | The bot runs every time the trigger matches. |
| Custom | After the bot runs, it won't run again for the same customer until the time you choose has passed (in days, weeks, months or years). |
Message nodes
These nodes send something to the customer.
| Node | What it sends |
|---|---|
| Text | A plain text message. |
| Buttons | A message with up to 3 reply buttons. Connect a Button Reply for each button, then build each path after it. Header and footer are optional. |
| List | A message with a menu button that opens a list. Connect List Section nodes (up to 10), and List Row nodes under each section (up to 10 per section). |
| Carousel | A main message with 2 to 10 swipeable cards. Connect Carousel Card nodes; each card has a picture or video, short text and 1 or 2 Carousel Button nodes. All cards must use the same media type. |
| Product List | Products from your catalog, grouped into Product Section nodes with Product nodes under them (up to 30 products in total). Shown only if your number has a catalog connected. |
| Catalog Message | A message that opens your whole WhatsApp catalog. Shown only if your number has a catalog connected. |
| Link | A message with a button that opens a web link. |
| Image | A picture (JPEG or PNG, up to 5 MB) with an optional caption. |
| Video | A video (MP4, MOV or 3GP, up to 16 MB) with an optional caption. |
| Document | A file such as a PDF, Word, Excel or PowerPoint file, with an optional caption. |
| Audio | A voice message. You can pick a file, upload one, or record it. |
| Template | One of your approved templates. |
| Flow | One of your published Forms. Connect a Flow Reply node to continue the bot after the customer submits the form. |
| Location | A map pin with a name and address. |
You can pick images, videos, documents and audio from your Media library or upload new ones.
Saved Messages in the left panel lets you drop one of your saved messages onto the canvas, buttons included.
Action nodes
These nodes work behind the scenes. Most of them pass straight on to the next node.
| Node | What it does |
|---|---|
| Transfer Chat | Assigns the chat to an agent, or to a group. Only agents marked as assignable appear. This is how a bot hands the customer to a person. |
| AI Employee | Hands the conversation to one of your AI Employees. The AI chats with the customer until the conversation ends, then the bot continues with the next node (if there is one). Shown only if AI Employees are available to your business. |
| Leads | Creates a lead for the customer, with the stage, source, priority, tags and agent you choose. Turn on Take over lead to give the lead to the agent who already has the chat. |
| Label | Adds one or more labels to the customer. |
| Phonebook | Adds the customer to a phonebook. |
| Update Entity | Saves the customer's answer into their contact (gender, city, state, country, preferred language) or their lead (stage, priority, source). Connect it after a Button Reply or List Row. |
| Time Delay | Waits 1 to 10 seconds before the next message, so replies don't arrive all at once. |
| API Request | Sends data to your own system (a web address you provide). Use Test Request to check it works. |
| API Response | Reads fields from the reply of the API Request before it and saves them as variables you can use in later messages. |
| n8n Webhook | Sends the conversation to an n8n workflow and waits up to 60 minutes for its answer. |
| Whatsapp Call | Sends a message with a button the customer can tap to call you on WhatsApp. |
| Call Permission Request | Asks the customer for permission to call them on WhatsApp. It has separate exits for Success, Calling Disabled, Already Granted and Rate Limited. |
INFO
Whatsapp Call and Call Permission Request appear only if calling is turned on for your business. They stay locked until your number's messaging limit is 2,000 or more. See Messaging limits & quality and Calls.
Hand a chat over to a person
There are three ways a bot conversation reaches a human:
- In the bot: add a Transfer Chat node, for example after a "Talk to an agent" button. The chat is assigned to the agent or group you chose.
- From the inbox, per customer: open the chat and use Stop Bot. The bot stops replying to this customer until you click Resume Bot. See Chatting (the inbox).
- From an AI Employee: the customer can leave the AI conversation, and the bot carries on with whatever you connected after the AI Employee node.
You can also run a bot on purpose from a chat: click Trigger Bot, pick the bot and confirm. This only works while the customer's 24-hour window is open. Triggering a bot also resumes it for that customer if it was stopped.
Turn a bot on or off
On the Bots page, use the switch in the Status column. Only active bots reply to customers. Turning a bot off keeps it and all its nodes; you can turn it back on at any time.
To change the name, number, trigger keywords, ad triggers or frequency without opening the canvas, click More > Quick Edit, then Save Changes.
Test a bot
Midlr has no separate test mode, so test with a real phone:
- Make sure the bot is active.
- From a WhatsApp number that is not your business number, send the trigger message to the business number the bot uses.
- Tap through each button and list option to check every path.
- Open the chat in the inbox to see what the bot sent. Bot messages are marked as sent by the bot.
TIP
If the bot's Trigger Frequency is Once, it won't run a second time for the same test phone. Use Always while you test, then change it with Quick Edit.
Bot analytics
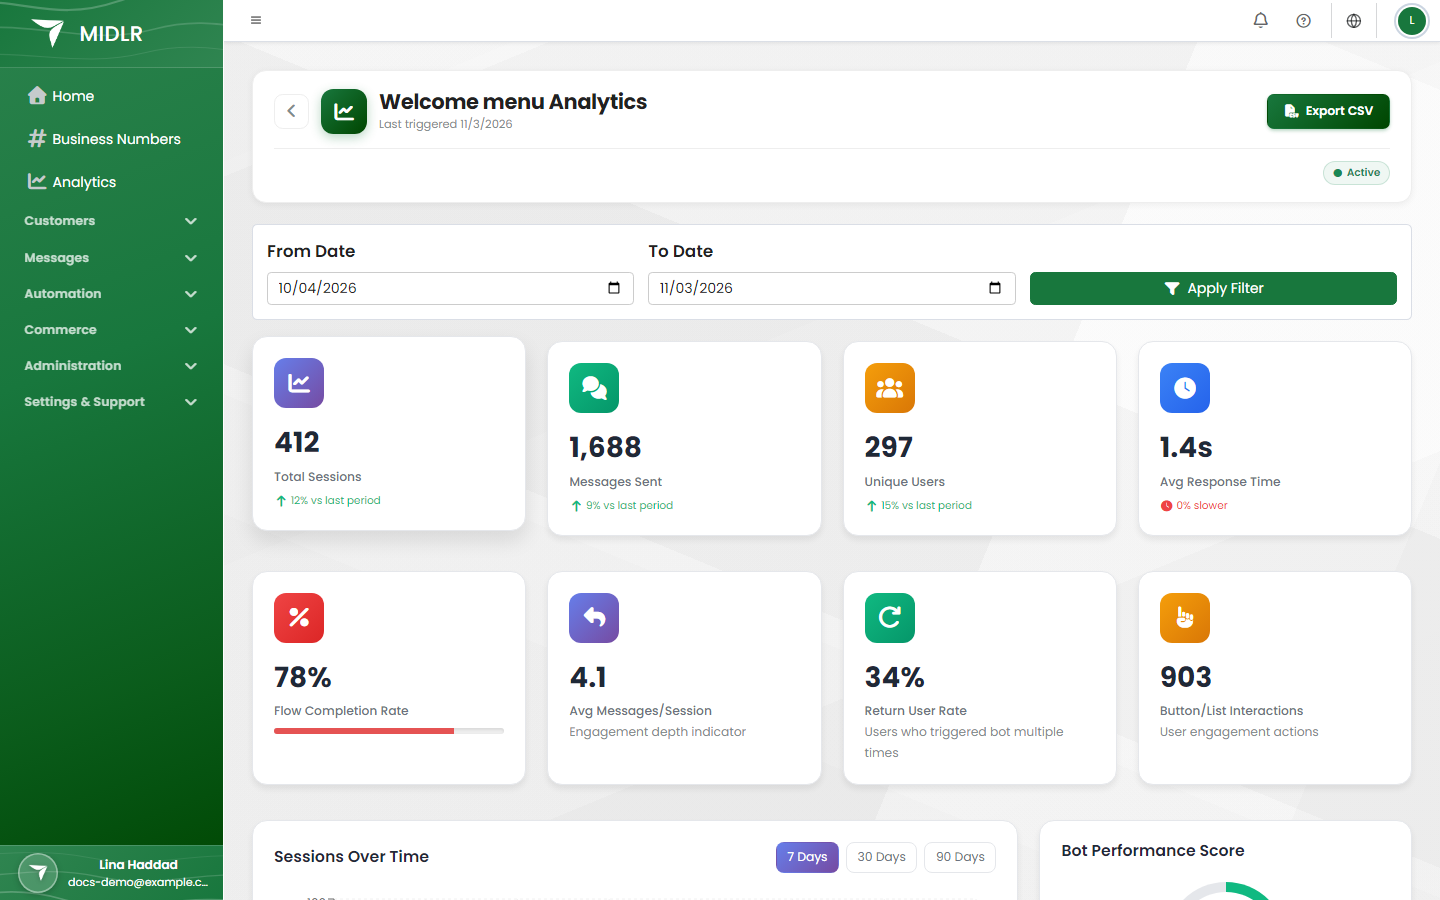
Click View Analytics on a bot to see how it performs: Total Sessions, Messages Sent, Unique Users, Flow Completion Rate, the busiest hours, which nodes customers drop off at, the most common paths, and recent sessions. Pick a date range and click Apply Filter, or click Export CSV to download the figures.
Duplicate or delete a bot
- Duplicate Bot makes a copy with a new name. Use it to try changes safely.
- Delete Bot removes the bot for good. If the bot used pictures or files that nothing else uses, Midlr offers to delete those from your Media library too.
WARNING
Deleting a bot can't be undone. If you only want it to stop replying, turn it off instead.
Common save errors
When you click Save, Midlr checks the bot and tells you what to fix:
- Unconnected Nodes Detected — every node must have a line coming into it. Connect it or delete it.
- Incomplete Flow — add at least one message or action after the trigger.
- The First Node Must Be A Trigger Node — start with a Text Trigger or Order Trigger.
- Fields with a red message need to be filled in or shortened.