
Users
Users are the people on your team who log in to Midlr: agents, managers, receptionists and so on. On the Users page you add new people, choose what they can do, and remove people who have left.
Before you start
- You need permission to view users, and to create, edit or delete them. See Roles & permissions.
- You need an active plan (or the free demo) to add users. Each plan allows a set number of users. See Plans.
Open the Users page
In the sidebar, open Administration and click Users.
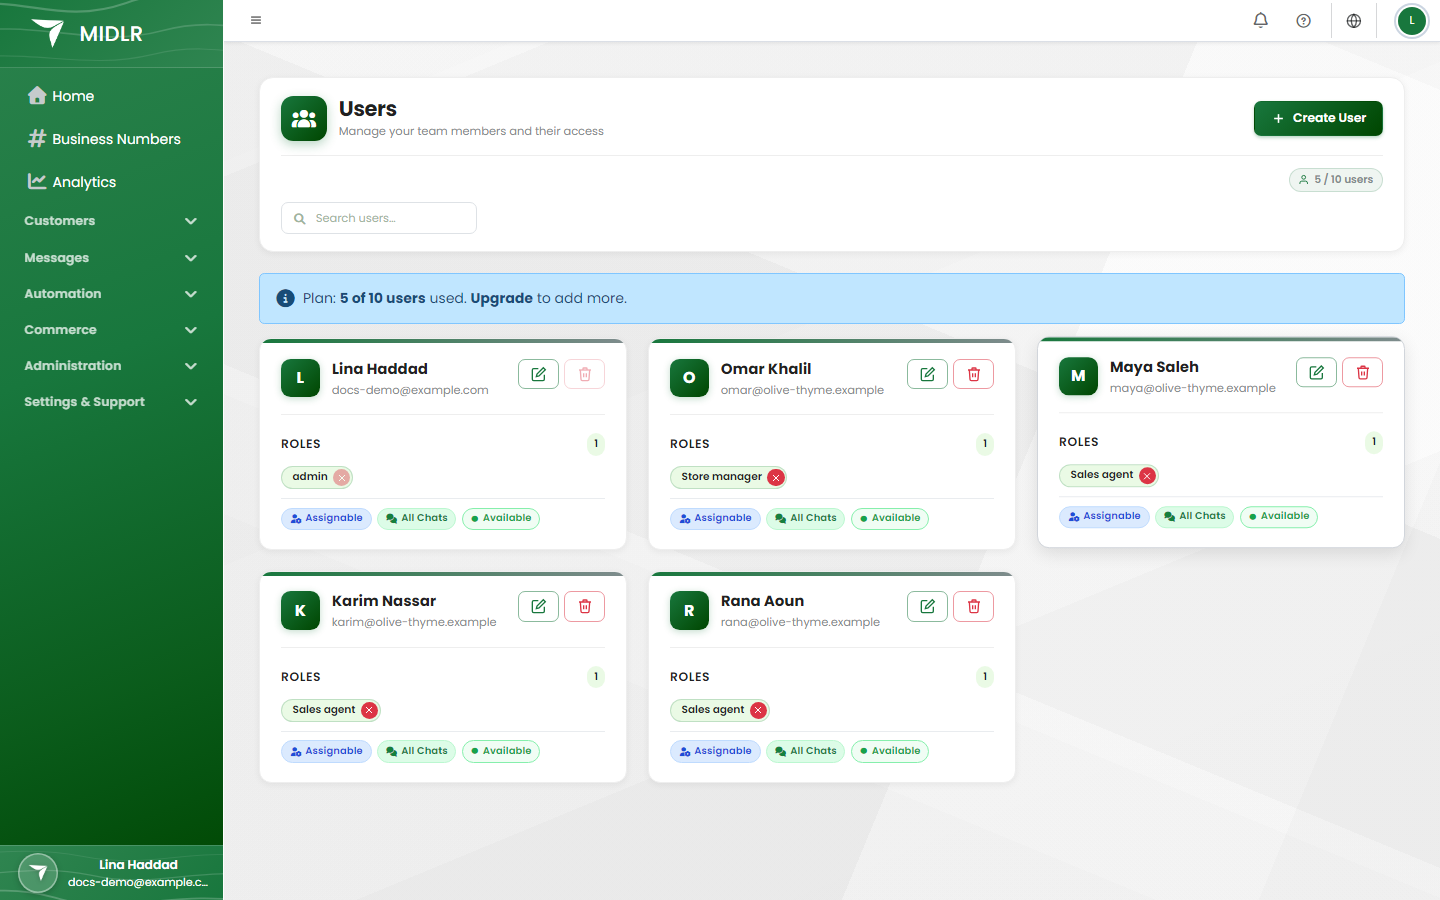
Each person appears as a card with their name, email and Roles. At the top you see how many users your plan allows and how many you have used, for example "3 / 5 users".
Add a user
When you add someone, Midlr sends them an email invitation. They choose their own password from that email, so you never need to know it.
- Click Create User.
- Under User Information, fill in:
- Full Name
- Email Address: the invitation goes here.
- Phone Number (optional)
- Profile Picture (optional): click Upload & Crop Photo, then Apply Crop.
- Under Role Assignment, click the roles this person should have. Your roles are roles your business made; Default roles come with Midlr.
- Check the Preview on the right, then click Create User.
The new user gets an email titled "You've been invited to join" your business, with a Set Your Password button.
TIP
The link in the invitation works for about one hour. If it runs out, the user can click Forgot Password? on the login page and use the same email address. You can also set a password for them yourself (see below).
If you've reached your user limit
When your plan's user limit is full, Create User is disabled and you see User limit reached. Click upgrade your plan to move to a plan with more users, or delete a user you no longer need.
Edit a user
- Find the user (use Search users… if your team is large).
- Click Edit on their card.
- Change what you need, then click Save Changes.
The Edit User page has these sections:
| Section | What you can change |
|---|---|
| Basic Information | Name, email, phone number, photo. New Password sets a new password for them; leave it blank to keep their current one. Passwords are 6 to 128 characters. |
| Role Management | Click a role to turn it on or off. You need permission to assign roles to see this section. |
| Permissions & Settings | Three switches that control which chats and leads reach this person (see below). |
| Phone Books | Phone books whose contacts this user can see. Only shown if you're allowed to edit phone books. |
Permissions & Settings switches
| Switch | What it does |
|---|---|
| Can Receive Chat | This user can be assigned chats. Turn it off for people who should never get customer chats, such as an accountant. |
| Lead Assignable | This user can be given new leads automatically. See Leads. |
| Show All Chats | This user sees every chat in the business, not only the chats assigned to them. |
TIP
New users start with all three switches turned off. After you create someone who should handle customers, open Edit and turn on Can Receive Chat (and Lead Assignable if they work leads).
Give a user access to phone books
If Show All Chats is off, a user sees the chats assigned to them. You can widen that by picking phone books: the user then also sees the chats of every contact in those phone books.
- On the Edit User page, go to Phone Books.
- Tick the phone books, or click Select all.
- Click Save Changes.
If Show All Chats is on, the phone book choice has no effect until you turn it off. See Phonebooks.
Call center roles
If your business uses the Call Center, a user can be a call center agent or a call center manager, but not both. If you pick one, Midlr removes the other and tells you.
Remove a role from a user
On the user's card, click the small remove button next to a role name and confirm. This only takes the role away; the user stays.
Delete a user
Delete a user when someone leaves your team. They can no longer log in, and they no longer count towards your plan's user limit.
- On the user's card, click Delete.
- Type
permanent deletein the box exactly as shown. - Click Delete.
The user moves to Recently Deleted at the bottom of the page. You have 3 days to bring them back; the card shows how much time is left.
WARNING
After 3 days the user is removed for good and can't be restored.
You can't delete:
- your own account,
- the original business owner,
- the last admin. Give someone else the Admin role first.
Restore a deleted user
- Scroll to Recently Deleted.
- Click Restore on the user's card, then confirm.
The user can log in again with their old email. Restoring needs a free place under your plan's user limit. It also fails if someone else is now using that email address.
The business owner
The person who created the Midlr account is the business owner. They always keep the Admin role, and their account can't be deleted.
Related
- Roles & permissions
- Groups
- Plans
- Account settings (your own profile and password)