
Forms
Forms are small apps that open inside WhatsApp. The customer taps a button, fills in a few screens (text boxes, choices, dates, photo uploads) and taps Submit, all without leaving the chat. Use them for sign-ups, surveys, feedback, lead capture and bookings. Meta calls these WhatsApp Flows; in Midlr they are called Forms.
Before you start
- You need a connected business number.
- Forms are available on selected plans. Standard forms need at least the Growth plan; Advanced forms need a higher plan. If you don't see Forms in your sidebar, check your plan or contact support.
- You need permission to see and manage forms. See Roles & permissions.
WARNING
Meta only lets businesses send forms once their business is verified and their messages are rated good quality. Midlr checks this through your messaging limit: below 2,000, the Forms page shows a warning instead of your forms. Verifying your business is the usual way to reach 2,000. Regular template messages still work. See Messaging limits & quality.
Standard or Advanced?
When you create a form, you choose its type. If you're not sure, choose Standard.
| Standard | Advanced | |
|---|---|---|
| Screen content | Text and questions you write in the builder | Can also load live content from your own server |
| Customer answers | Collected and sent when the form is submitted | Can be sent to your server at each step |
| Screen order | One screen after another | Can jump to different screens based on answers |
| Setup | None — ready to use | Needs an API endpoint (usually a developer) |
| Best for | Surveys, sign-ups, feedback, lead capture | Bookings, live availability, personalised quotes |
Advanced forms also need a Meta encryption key. If the Advanced card shows Needs Meta key, click it and confirm to run Setup Meta Key. When it shows Meta key ready, you can create Advanced forms.
The Forms page
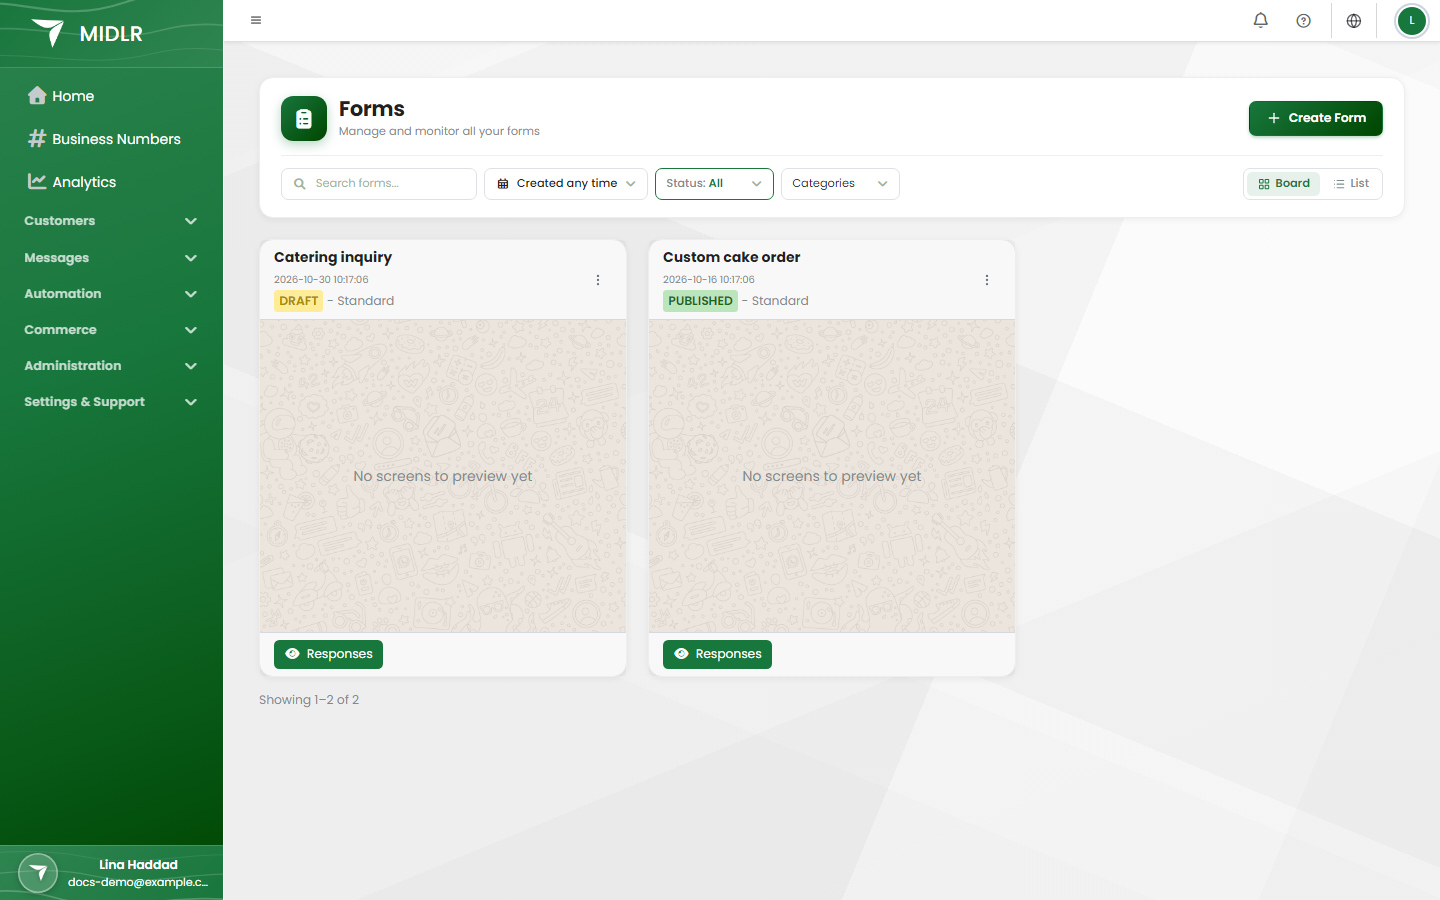
In the sidebar, under Automation, click Forms. You see all your forms with their Type (Standard or Advanced) and Status:
| Status | Meaning |
|---|---|
| Draft | Saved, but not live yet. You can still edit it, test it and delete it. |
| Published | Live. You can send it to customers. |
| Cloned | A copy from the library that you haven't saved yet. Save it before you publish it. |
Switch between grid and table layout, search by name, filter by status or category, and sort by date.
Create a form
- On the Forms page, click Create Form.
- Choose how to start:
- Standard or Advanced for an empty form, or
- pick a form from the library under Or start from the library, then click Use This Form.
- The builder opens. On the left, under Screens, you see your screens. Each screen is one page the customer sees.
- Drag items from Components onto a screen, or click the + next to an item.
- Click an item to edit its text, options and whether it's required.
- Click Add another screen to add more pages.
- Watch the Live Preview on the right to see how the form looks on a phone.
- Click Configure & Save (or press Ctrl+S).
Components you can use
| Group | Components |
|---|---|
| Text & Headings | Page Title, Section Title, Paragraph, Small Note, Formatted Text |
| Text Answers | Short Answer (one line), Long Answer (several lines) |
| Choices | Single Choice, Multiple Choice, Dropdown List, Tags (pick many), Terms Agreement |
| Dates | Date, Date or Date Range |
| Uploads | Photo Upload (camera or gallery), File Upload (documents) |
| Images | Image, Image Slideshow |
| Buttons & Links | Next Button (go to another screen), Submit Button (finish the form), Link, and on Advanced forms API Request Button (sends the answers to your server, which decides what happens next) |
A Standard form has one Submit Button. Meta limits how long each label can be; the builder shows the limit and warns you when text is too long.
TIP
The check mark at the top of the builder shows Valid when the form has no errors. If it shows errors, click it to see what to fix.
Choose what happens when a form is submitted
When you click Configure & Save, Midlr asks what should happen automatically when a customer completes the form. This step is optional.
| Action | What it does |
|---|---|
| Add to Leads | Creates a lead from the customer's answers. |
| Add to Phonebook | Adds the customer's number to a phonebook you pick. |
| Update Client | Saves the answers on the customer's contact record. |
| Continue without an action | Saves the form with no automatic action. You can add one later. |
For Add to Leads and Update Client, you then match each form answer to a field (for example, the "Your email" answer goes to Email). Click Auto-map to match fields by name, then check the result. Answers set to — Don't save — are ignored.
Finally, give the form a Form name, pick the Business number and any Categories, and save.
Test a form
- Save the form.
- Click Send Test.
- Pick the Sender (your business number).
- Under Send to, pick a contact or add a New contact with a phone number.
- Send, then open the form on that phone and try every screen.
You can also click Preview at any time to try the form inside the builder.
Publish a form
When the form works the way you want, click Publish and confirm.
WARNING
Once a form is published, you can't edit it. To change it, use Make Draft first; the form then can't be used for new messages until you publish it again.
Published forms can't be deleted directly. When you click Delete on a published form, Midlr offers Make Draft & Delete.
Send a form to customers
There are several ways to send a published form:
- In a chat: in the inbox, open the attachment menu, choose the form and click Send Flow. See Sending messages. The customer's 24-hour window must be open.
- In a bot: add a Flow node in the Bot Factory. Connect a Flow Reply node to continue the bot after the customer submits.
- In a template: add a Flow Button to a Marketing template, then send it in a campaign or from a chat. Templates can reach customers even when the 24-hour window is closed. See Templates.
Use the Form Library
The library has ready-made forms grouped by category: Sign up, Sign in, Appointment booking, Lead generation, Shopping, Contact us, Customer support, Survey and Other.
- Click Create Form and browse the forms under Or start from the library.
- Pick a form to preview it.
- Click Use This Form.
- Edit it, then save it before you publish. A copied form must be saved first.
View responses
To see what customers sent, click Responses on a form card (or View Responses in the table).
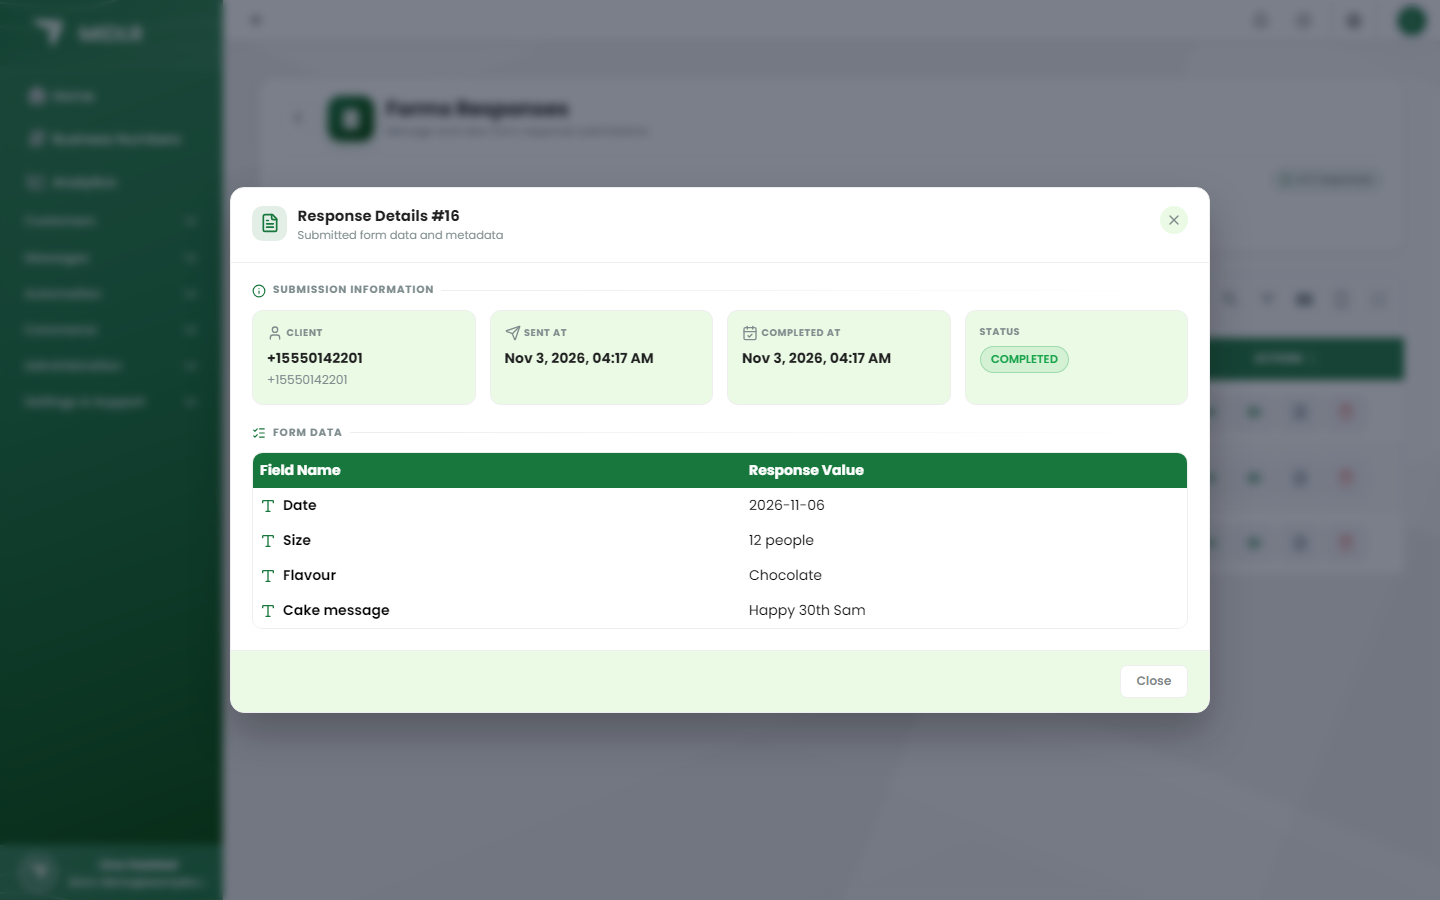
The Forms Responses page lists every form sent, with the Client, Form Name, Status and dates:
| Status | Meaning |
|---|---|
| Pending | The form was sent but the customer hasn't submitted it yet. |
| Completed | The customer submitted the form. |
| Failed | Something went wrong with this submission. |
- Click View to see each answer. Photos and files the customer uploaded are shown too.
- Search by phone number or form name, and filter by form or status.
- Click Export to download the responses as an Excel file.
View statistics
Click Stats on a form to open Form Statistics. Pick a form (or All Forms) and a date range, then click Search. You see:
- Total Submissions, Completed, Pending and Failed, with the completion rate and number of unique customers.
- A Daily Submissions Trend chart and a Status Distribution chart.
- Submissions by Form when you look at all forms.
- Completion Time Statistics: the average, fastest and slowest time customers took.